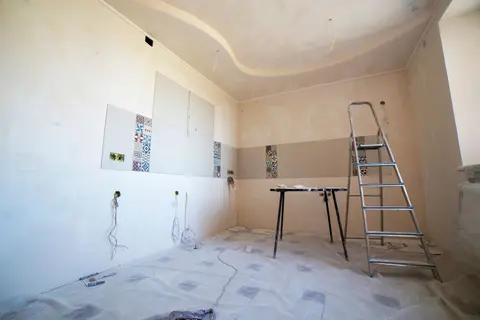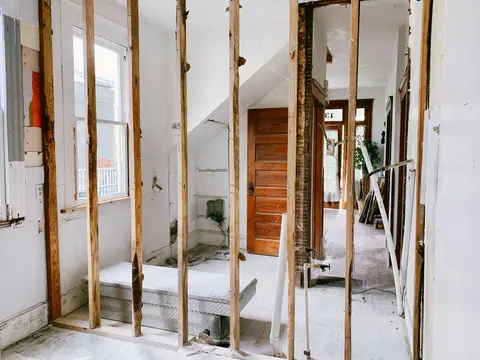
The single most expensive mistake in a home renovation is doing things in the wrong order. Tiling a bathroom before the plumber has run the shower waste means ripping up tiles; painting walls before the electrician has chased cables means hacking through fresh plaster. A correct order of works is not about perfectionism, it is about avoiding paying for the same job twice.
The sequence below is the industry-standard approach used by experienced project managers and principal contractors. Not every project needs every phase, but the relative order between phases is almost always correct.
The Core Principle
Work outside in, top to bottom, structure before services before finishes. Every trade that comes later must not disturb the work of a trade that came before it. This single rule explains the entire sequence.
Phase 1: Pre-Start and Planning
Before any tools appear on site:
- Obtain planning permission and Building Regs approval (or confirm permitted development applies).1
- Serve Party Wall Notices if required (a section 3 party structure notice must be served at least 2 months before works start; a section 1 line of junction notice and a section 6 excavation notice need at least 1 month, see Party Wall agreements).234
- Appoint and brief your structural engineer if loadbearing walls, floors, or lintels are affected.
- Set up temporary accommodation if you are vacating the property.
- Arrange a site skip; a skip on a public road needs a council licence (permit), which the skip hire company usually obtains, and the fee is set locally, so it varies between councils.5
- Confirm utilities: locate and mark up gas, water, and electricity routes; arrange isolation if needed.
Phase 2: Strip-Out and Demolition
Everything that needs to come out comes out now, before any new material arrives on site:
- Remove carpets, floor coverings, and loose furniture
- Strip back plaster from walls to be chased, tanked, or rebuilt
- Remove kitchens, bathrooms, and sanitary fittings marked for replacement
- Take down internal walls to be removed (after structural engineer confirmation)
- Remove redundant staircases, built-in joinery, or fitted wardrobes
- Strip out old insulation, heating systems, and electrical boards being replaced
Hire a 6–12 yard skip; separate materials for recycling or salvage. This is the correct point to engage a damp survey if there is any visual evidence of moisture problems, before works conceal or complicate it.
Phase 3: Structural Works
All structural work is completed while the building is still open, before any finishes go in:
- Install new RSJ beams or flitch beams as designed, with temporary acro props where the engineer specifies them
- Rebuild or underpin foundations if required
- Install new or replacement structural floors (concrete slab, or engineered timber cassettes)
- Replace rotten or defective joists; strengthen existing floor structure if needed
- Address any subsidence or movement identified in surveys
Building Control inspection required after structural works are complete (or in stages as specified on the Regs application).
Phase 4: External Envelope
Make the building weathertight before interior works begin:
- New roof covering, replacement tiles, or felt underlay if required
- Repair or replace fascias, soffits, and guttering
- New or repaired external walls (brickwork, cladding, render base coats)
- Window and external door replacements installed in openings
- External insulation (EWI) applied if included in scope
- Damp-proof course treatment or tanking to basement and ground floor walls
Do not start first-fix services until the building is fully weathertight. Moisture ingress damages plasterboard, timber studwork, and ironmongery.
Phase 5: First-Fix Services
Services are run before any wall or ceiling finishes are applied:
| Trade | What happens at first fix |
|---|---|
| Electrician | Cable routes (clipped or buried in chase), back boxes, consumer unit position confirmed |
| Plumber | Pipework runs (central heating, hot and cold water supply, soil and waste) |
| Gas engineer | Gas pipework if relocating boiler or radiators |
| MVHR/ventilation | Duct runs to each room; manifold positions |
| Underfloor heating | Pipe loops laid in screed or on timber sub-base |
Chase all cables and pipes before any insulation or boarding. Building Control must be given notice before any foundation, damp-proof course, concrete laid over the site or new drain is covered up, so allow for an inspection before screed is poured, and pressure-test heating pipework before it is buried.6
Phase 6: Insulation and Airtightness
With services in first-fix position, insulation and airtightness membranes are installed:
- Wall insulation (IWI boards, stud frame with batts)
- Floor insulation under screed or between joists
- Ceiling/roof insulation (loft or room-in-roof)
- Airtightness membrane taped at all junctions (important for energy performance and the home’s EPC rating)
- Window reveals and service penetrations sealed
Phase 7: Drylining and Plaster
Boards and plaster go on once all services are chased and insulated:
- Plasterboard to ceilings and walls (or lime plaster on solid walls)
- Dot-and-dab or mechanical fixing, taped and jointed, skim plaster
- Fibrous plaster cornice or ornamental mouldings if reinstating period features
- Allow new plaster to dry fully before decorating: a thin skim dries much faster than thick backing coats or wet plaster on solid walls, which can take several weeks (varies with thickness, heating and ventilation)
Phase 8: Second-Fix Services
Services are completed to finished positions, after walls and ceilings are plastered, before floor finishes:
- Electrician: switches, sockets, light fittings, consumer unit connections
- Plumber: sanitaryware, taps, shower enclosures, radiators, boiler commissioning
- Gas engineer: boiler installation and Gas Safe certificate
- MVHR: terminals, balancing, commissioning
Phase 9: Joinery and Internal Doors
- Staircase and balustrade (if new or replaced)
- Internal door linings and doors hung
- Skirting boards, architraves, window boards
- Built-in wardrobes or kitchen carcasses
Phase 10: Floor Finishes
Floor finishes go on after all services are live and tested, and after all dust-generating joinery is complete:
- Floor screed (if not already poured) must be dry enough for the chosen finish, usually confirmed with a hygrometer test (75% RH is a common target for resilient floors); a sand-cement screed can take several weeks to a few months to get there
- Tile, stone, or LVT to wet rooms first
- Engineered timber or solid wood flooring
- Carpets last of all, after decorating (Phase 12) is complete
Phase 11: Tiling and Wet Room Finishes
- Full bathroom wall tiling, coordinated with the plumber so tiles go on before basins, WCs and shower enclosures are fixed at second fix
- Shower enclosures, glass screens
- Waterproofing (tanking) must be independently checked if behind tiles, once tiled, it cannot be inspected
Phase 12: Decorating
- First coat (mist coat or primer on new plaster)
- Fill and sand any imperfections
- Final paint coats to walls and ceilings
- Gloss or satinwood to woodwork
- Fit ironmongery (door handles, hinges) after final coat to avoid paint fouling
Phase 13: Snagging, Commissioning, and Sign-Off
- Final Building Control inspection and completion certificate
- BS 7671 electrical installation certificate from the electrician, plus a Building Regulations compliance certificate from their competent person scheme7
- Building Regulations compliance certificate for any new boiler or gas appliance, arranged by the Gas Safe registered engineer8
- Boiler serviced and commissioned
- FENSA or Certass certificate for replacement windows and doors (if not covered by a Building Regulations application)8
- Snagging walkthrough, prepare a written list for the contractor; allow 2 weeks for snags to be remedied before releasing final payment retention (typically 2.5–5%)
Common Mistakes to Avoid
| Mistake | Consequence |
|---|---|
| Flooring before second-fix plumbing | Boards cut around pipes; impossible to replace without lifting floor |
| Plastering before services are chased | Cables and pipes chased through fresh skim |
| Decorating before floor screeds are dry | Moisture migration discolours paint; skirting boards cup |
| Fitting kitchen before ceiling is plastered | Dust and debris on new cabinets; cabinets must be masked |
| Tiling before waterproofing is inspected | Failed tanking undetectable until damage occurs |
Following the sequence above costs nothing extra, it is simply the right order. Deviating from it almost always results in additional cost, delay, or both.
The rules in this note are those that apply in England. Scotland, Wales and Northern Ireland have their own building standards and permitted development rights.
References (8)
Figures in this note were checked against the sources below on 30 September 2026. Superscript numbers in the text point to them. Every source the site cites, by topic.
- 1technicalvery strongThe National Archives, legislation.RN-OWGIY3Schedule 2 Part 1 of the GPDO 2015, development within the curtilage of a dwellinghouse. This is permitted development itself: Class A enlargement and alteration, with the limits and conditions, through the classes covering roof alterations, porches, outbuildings and hard surfaces. Every statement about what can be built without planning permission traces to this Part, and the exclusions at the start of each class are where most projects actually fall out.
- 2technicalvery strongThe National Archives (legislation.gov.uk), legislation.RN-QBUTY2The exact wording of the two excavation triggers that decide whether a basement or a deep foundation needs a party wall notice, worth quoting rather than paraphrasing. Section 6(1) applies where the building owner proposes to excavate, or excavate for and erect a building or structure, within a distance of 3 metres measured horizontally from any part of a building or structure of an adjoining owner, and the excavation will within those 3 metres extend to a lower level than the level of the bottom of the neighbour's foundations. Section 6(2) applies within 6 metres measured horizontally where the work will within those 6 metres meet a plane drawn downwards in the direction of the excavation at an angle of 45 degrees to the horizontal. Section 6(5) requires the building owner to serve notice on the adjoining owner at least one month before beginning to excavate. Section 6(7) provides that if the adjoining owner does not serve a notice indicating consent within 14 days, they are deemed to have dissented and a dispute has arisen, which is what triggers the surveyor and award process.
- 3technicalvery strongThe National Archives (legislation.gov.uk), legislation.RN-8KXE9KThe section that catches a garden wall built on or up to the boundary, which most homeowners assume the Party Wall Act does not reach. Section 1 applies where lands of different owners adjoin and are either not built on at the line of junction, or are built on only to the extent of a boundary wall that is not a party fence wall or the external wall of a building, and either owner is about to build on any part of the line of junction. Section 1(2) requires a building owner who wants to build a party wall or party fence wall on the line of junction to serve notice on the adjoining owner at least one month before the work is intended to start, describing the intended wall. If the adjoining owner consents under section 1(3), the wall is built half on each owner's land or as otherwise agreed and the cost is shared; the section extends to England and Wales only.
- 4technicalvery strongThe National Archives (legislation.gov.uk), legislation.RN-C6XFB7A party structure notice must be served at least two months before the date on which the proposed work will begin, and must state the building owner's name and address, the nature and particulars of the proposed work (with plans, sections and load particulars where special foundations are proposed) and the date the work will begin. The notice ceases to have effect if the work has not begun within twelve months of service or is not then prosecuted with due diligence. Two months for a party structure notice against one month for a section 6 excavation notice is the distinction to cite.
- 5technicalvery strongGOV.UK, guidance.RN-UE5N0QThe government's licence page for skips. It says a skip on a public road needs a council licence and that the skip hire company usually obtains it.
- 6technicalvery strongThe National Archives (legislation.gov.uk), legislation.RN-6CCBA1Regulation 16(1) bars starting building work until notice of intention to start has been given to the relevant authority and at least two days have elapsed since the end of the day the notice was given. Regulation 16(3) lets the authority serve written notice requiring notification when a specified stage is reached, and may set a period before or after the work within which to notify and a period during which the work must not be covered up; under 16(3A) and 16(3B) a stage may only be specified if the authority intends to inspect it, based on its assessment of the risk of a breach. Regulation 16(3C) requires notice that work has commenced within five days of commencement, with a rejection notice possible within four weeks (16(3E)), deemed commencement if no rejection is given (16(3F)), and an appeal to the First-tier Tribunal within 21 relevant days (16(3H)) on grounds of error of fact, error of law, unreasonableness or failure to follow procedure. Regulation 16(4) requires notice within five days of completion.
- 7technicalvery strongMinistry of Housing, Communities and Local Government.RN-JYJ3I5The document that decides what electrical work a homeowner may legally do themselves, and the exact list of notifiable jobs. Regulation 12(6A), reproduced at paragraph 2.5, makes only three things notifiable: the installation of a new circuit, the replacement of a consumer unit, and any addition or alteration to existing circuits in a special location. Regulation 12(9) defines special location as, in a room containing a bath or shower, the zone extending vertically from finished floor level to 2.25 metres (or the shower head position if higher) and horizontally 600mm from the edge of the bath tub or shower tray. Paragraph 2.7 states that all other electrical installation work is not notifiable, namely additions and alterations to existing installations outside special locations, and replacements, repairs and maintenance anywhere. Paragraph 2.8 gives worked examples: a built-in cooker is not notifiable unless a new cooker circuit is needed, and connecting an electric gate or garage door to an existing isolator is not notifiable but running a new circuit from the consumer unit to that isolator is. Paragraph 2.2 confirms Part P reaches outdoor work including fixed garden lighting, pond pumps and outbuildings such as sheds, detached garages and domestic greenhouses. Notifiable work must be certified by self-certification by a registered competent person, third-party certification, or a building control body (paragraph 3.1), with the compliance certificate issued within 30 days (paragraph 3.4). Note that Approved Document P is a source of guidance rather than a ban: non-notifiable work still has to comply with BS 7671.
- 8technicalvery strongGOV.UK, guidance.RN-YYKICUGOV.UK guidance explaining that installers registered with a competent person scheme, for example for windows or boilers, self-certify work instead of the owner applying for approval.
-
The Town and Country Planning (General Permitted Development) (England) Order 2015, Schedule 2, Part 1, The National Archives, accessed 14 September 2026. legislation.gov.uk
-
Party Wall etc. Act 1996, section 6: Adjacent excavation and construction, The National Archives, accessed 30 September 2026. legislation.gov.uk
-
Party Wall etc. Act 1996, section 1: New building on line of junction, The National Archives, accessed 30 September 2026. legislation.gov.uk
-
Party Wall etc. Act 1996, section 3: Party structure notices, The National Archives, accessed 30 September 2026. legislation.gov.uk
-
Skip licence (England and Wales), GOV.UK, accessed 30 September 2026. gov.uk
-
The Building Regulations 2010, regulation 16: Notices to local authority, The National Archives, accessed 30 September 2026. legislation.gov.uk
-
Approved Document P: Electrical safety, dwellings, 2013 edition, Ministry of Housing, Communities and Local Government, accessed 30 September 2026. assets.publishing.service.gov.uk
-
Building regulations approval: use a competent person scheme, GOV.UK, accessed 30 September 2026. gov.uk