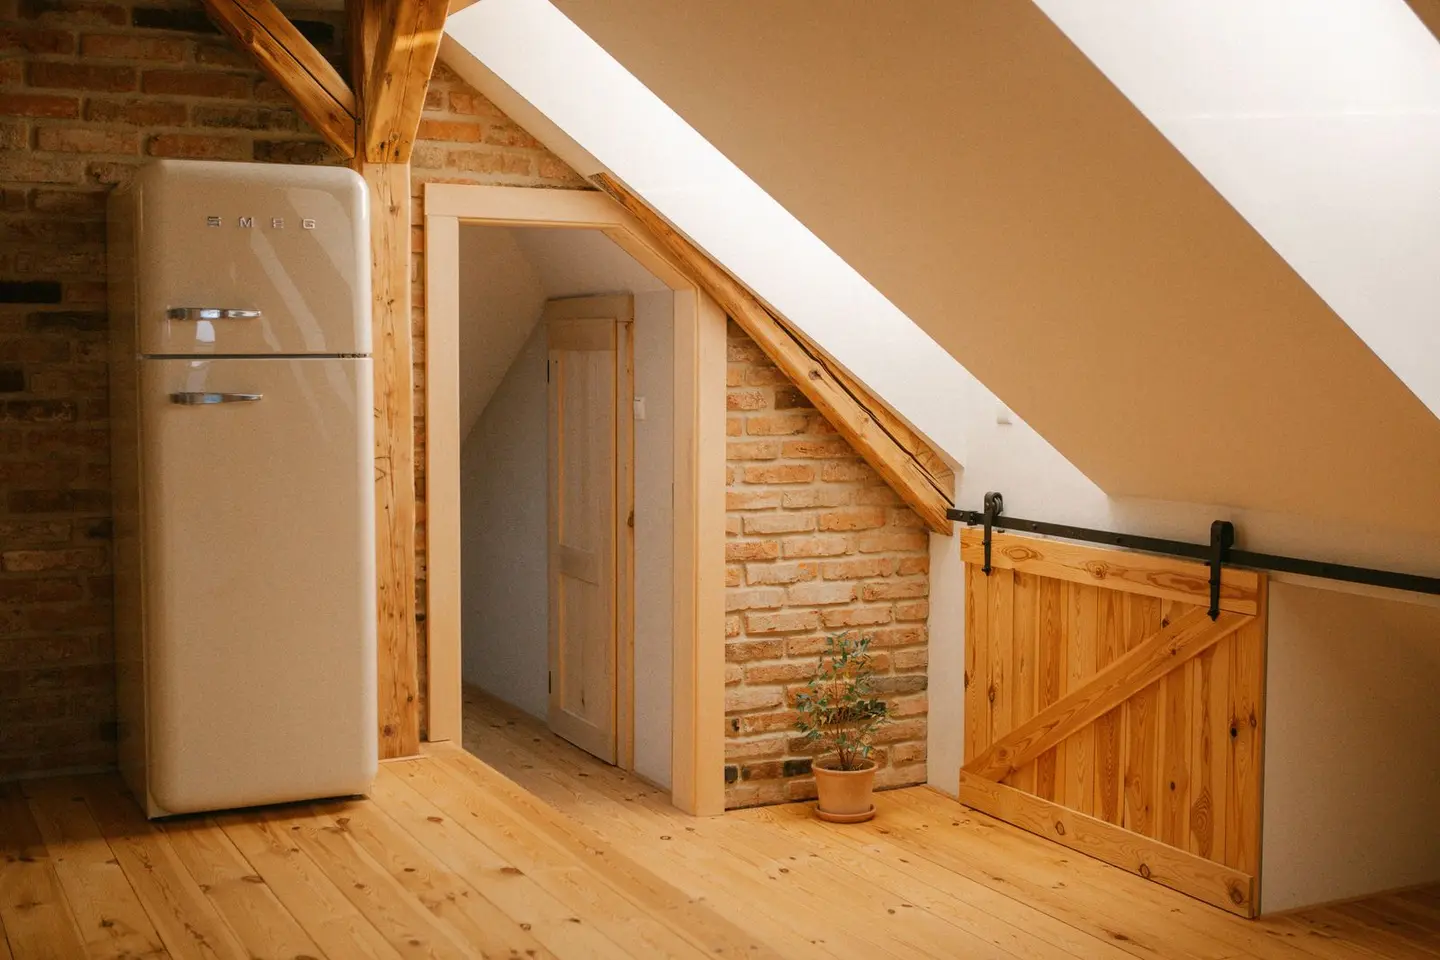
Most loft conversion problems are entirely avoidable. They tend not to emerge on site, they are embedded in the design stage, often weeks before a contractor turns up. The mistakes below are the ones that generate the most retrospective cost and the most disputes between homeowners and builders. Getting each one right costs almost nothing compared with fixing it after the fact.
This article covers the five categories that come up again and again in building control sign-offs and professional surveys: head height, stair placement, insulation, planning compliance, and structural sign-off. Alongside each we have included 2026 UK costs and the relevant Building Regulations part so you can cross-reference directly.
Head-Height Misjudgement
This is the single most common reason a loft conversion fails to deliver a usable room. England’s Building Regulations set no minimum ceiling height for a habitable room. The 2,000mm (2.0m) figure people quote is Part K’s headroom over the stair, which in a loft conversion is allowed to reduce to 1.9m at the centre of the stair and 1.8m at the edge, and no lower.1 In practice, designers target at least 2,100–2,200mm at the ridge to allow for slopes reducing height toward the eaves.
The mistake is measuring to the existing ridge board rather than to the finished ceiling level. Once you account for:
- New structural floor (typically 225–300mm deep, including joists and boarding)
- Insulation and plasterboard to the rafters (typically 150–200mm)
- Any upstand for the roof light kerb
…the finished ceiling can be 350–500mm lower than the bare ridge measurement. A ridge at 2,400mm measured from the existing loft floor may only produce a 2,000mm finished height, exactly at the level most designers treat as the practical floor, with zero margin.
When to add a dormer for headroom. If the ridge sits below approximately 2,200mm from the existing loft floor, you will almost certainly need a dormer to achieve compliant and comfortable headroom over a meaningful floor area. A rear dormer typically adds £15,000–£25,000 or more to the project cost (2026) but converts an unusable roof space into a genuine room. Discovering this after planning and structural drawings have been completed costs far more than establishing it at feasibility stage.
Get a measured survey, not a self-measurement, before commissioning drawings. A structural engineer or experienced architect will establish finished-floor-to-finished-ceiling clearances in the first hour of a site visit.
Bad Stair Placement
A staircase to a loft conversion typically occupies 4–6m² of floor plan on the landing below. Placed poorly, it eliminates a bedroom. Placed well, it loses a landing cupboard at worst.
Building Regulations Part K sets a maximum pitch of 42° for a private stair in a house.1 Alternating-tread (space-saver) stairs can be steeper, because their 220mm minimum going is measured between alternate nosings, but Part K permits them only in a loft conversion, only where a conforming stair will not fit, and only to serve one habitable room plus, if wanted, a bathroom or WC that is not the only WC in the home.1 The practical implication is that a stair climbing about 2,400mm from the first floor to the new loft floor needs roughly 2,500mm of floor length for the flight alone even at the 42° maximum, plus landing space at each end, and more at a gentler pitch.
The commonest error: placing the new stair directly above the existing stairwell without checking the head clearance at the bottom of the new flight. The existing stair structure may be only 400mm below where the new stair will land. The result is a hole in the ceiling with nowhere to safely get in or out of the loft.
Headroom over a stairway must be at least 2,000mm measured vertically above the pitch line (Part K again), or 1.9m at the centre and 1.8m at the side where a loft conversion cannot achieve 2m.1 Work through this geometry, with dimensions on paper, before finalising where the stair goes. Relocating a stair after structural work has begun typically costs £3,000–£8,000 in abortive work plus redesign fees.
Skimping on Insulation
Loft insulation is rarely the most visible line in a specification, which is why it is often where value-engineered builders make cuts. The consequences, cold rooms, condensation, damp, and fuel bills, emerge years after the builder has been paid.
Building Regulations Part L (Conservation of fuel and power) asks for a U-value of 0.15 W/m²K for new roof built as part of the conversion, such as a dormer, and 0.16 W/m²K for the existing roof slopes, which are upgraded as retained thermal elements.2 Approved Document L treats a loft conversion as a change to energy status for the converted space, not a material change of use.2 Achieving 0.15 W/m²K requires a substantial insulation depth, not a token layer.
Cold roof vs warm roof construction matters. In a cold-roof build, insulation sits between and below the rafters with a ventilation gap above. In a warm-roof (or hybrid) build, insulation is continuous above or between the rafters without a cold void. Warm-roof construction is generally preferable for conversions because it eliminates the condensation risk at the cold-roof void, but it typically costs more in materials.
A common error is specifying 50mm mineral wool between 100mm rafters. This leaves the roof at roughly 0.6–0.7 W/m²K, about four times the 0.16 W/m²K target and nowhere near compliant. A typical starting point is 100mm PIR (polyisocyanurate) board between the rafters plus 50mm PIR on the warm side, with taped and sealed vapour control, but on the figures below even that only reaches about 0.17 W/m²K, so a compliant build-up usually needs deeper rafters, a thicker layer below or insulation over the rafters, confirmed by the installer’s U-value calculation. The cost difference between an adequate insulation package and an inadequate one is relatively modest:
| Insulation specification | Approximate U-value | Cost for typical 40m² roof plane |
|---|---|---|
| 50mm mineral wool between 100mm rafters | ~0.65 W/m²K | £400–£600 |
| 100mm PIR between rafters + 25mm PIR below | ~0.22 W/m²K | £1,800–£2,500 |
| 100mm PIR between rafters + 50mm PIR below | ~0.17 W/m²K | £2,500–£3,500 |
| Spray foam (closed-cell, full-fill) | ~0.18 W/m²K | £3,500–£5,500 |
Getting this right at first fix costs £2,500–£5,000 for a typical conversion. Retrofitting compliant insulation after completion, which Building Control can require, costs two to three times as much once you account for stripping finishes, reinstatement, and contractor call-out.
Planning Missteps
Many loft conversions in England are permitted development, which means planning permission is not required, but this does not mean there are no rules to follow. Getting the PD regime wrong is one of the most expensive administrative mistakes a homeowner can make.
Permitted development limits for loft conversions (Class B, GPDO 2015):
- 40m³ of additional roof space for a terrace house, meaning one in a row of three or more34
- 50m³ in any other case, which includes semi-detached and detached houses4
- No extension beyond the plane of any existing roof slope that forms the principal elevation and fronts a highway4
- No part higher than the highest part of the existing roof4
- Materials similar in appearance to the existing house, and the enlargement set back, so far as practicable, at least 0.2m from the eaves4
These are cumulative limits for the whole dwelling, meaning any previous roof alterations count toward the allowance.4 A homeowner who fitted a rear dormer in 2018 and now wants to add a hip-to-gable may find they have already used their permitted development volume.
Class B does not apply at all on article 2(3) land.4 That land includes conservation areas, National Parks and Areas of Outstanding Natural Beauty, so a roof extension there needs planning permission.5 Elsewhere, Article 4 Directions can remove permitted development rights in particular areas, often in parts of London and other cities.6 Before assuming PD applies, check with the local planning authority or use the Planning Portal’s eligibility tool. Getting this wrong means retrospective planning permission applications (which can be refused) and potential enforcement action.
Lawful Development Certificates. Even where PD rights clearly apply, obtaining an LDC from the council is strongly advisable. The application fee is half the householder planning fee, which works out at £274 in England from 1 April 2026.7 The council then has 8 weeks to decide.8 Without one, you have no formal record that the works were lawful, which matters when you come to sell. Solicitors increasingly ask for LDCs on loft conversions.9
Party wall notices. If your loft conversion involves work on or near a shared wall, or if any foundation or beam work involves excavating within 3 metres of a neighbour’s structure and deeper than their foundations, or within 6 metres where the dig would cut a line drawn down at 45 degrees from the bottom of those foundations, the Party Wall etc. Act 1996 applies.10 You must serve notice before work begins. The Act has no enforcement procedure for failing to serve notice, but a neighbour can go to court for an injunction to stop the work, or seek other legal redress.11 Party wall surveyor fees typically run £900–£2,700 for a standard project, or around £1,000 where one agreed surveyor acts for both owners, and can double if each owner appoints their own.1213
Choosing the Cheapest Quote Without Reading the Specification
The final and perhaps most avoidable mistake is selecting a contractor based on price without understanding what the price does and does not include. A £42,000 quote and a £58,000 quote for the same conversion are rarely like-for-like. The lower quote commonly omits:
- Structural engineer’s calculations and sign-off
- Party wall surveyor fees
- Building Control application and inspector visits
- Staircase supply (sometimes listed as a provisional sum that is then upgraded at extra cost)
- Velux roof lights (listed at standard grade when the homeowner assumed white finish, triple glazing, or solar-powered)14
- Electrics first and second fix
- Plastering
- Decoration
Ask every contractor for a line-by-line breakdown and a clear statement of what is excluded. The scope should match Building Control drawings, not be looser than them.
Contingency budget. A loft conversion is structural work in an old building. Unexpected findings, rotten purlins, undersized ceiling joists, asbestos in older Artex, are common.15 Allow a contingency of no less than 10% on top of the contracted sum, and more on an older house, held in reserve and only drawn on for genuinely unforeseen items.16
What Mistakes Cost to Fix Retrospectively
The table below summarises approximate retrospective remediation costs where mistakes are discovered after completion, whether by Building Control, a surveyor instructed on a sale, or a subsequent owner.
| Mistake | Cost to prevent | Cost to fix retrospectively |
|---|---|---|
| Head height too low (dormer required) | £0, caught at feasibility | £18,000–£30,000 (full dormer retrofit) |
| Stair relocated after structural work | £500 (early design iteration) | £3,000–£8,000 |
| Non-compliant insulation (Part L failure) | £2,500–£5,000 at first fix | £6,000–£12,000 (strip, re-insulate, reinstate) |
| No Lawful Development Certificate | £274 application fee | £800–£3,000+ (retrospective LDC or planning; may affect sale) |
| Party wall, no notice served | £0 (serving notice is free) | £1,500–£5,000+ (legal costs if dispute arises) |
| No structural engineer sign-off | £800–£1,500 (engineer fee) | £2,000–£5,000 (retrospective assessment, potential remedial work) |
The pattern is consistent: prevention costs a fraction of the cure. The items that feel like overhead at the start of a project, structural engineer fees, an LDC application, a properly specified insulation package, are the ones that protect the budget and the project’s long-term value.
Summary Checklist Before You Commit
- Establish finished-floor-to-finished-ceiling headroom from a measured survey, not a tape measure held to the ridge
- Work through stair geometry on a dimensioned section drawing before finalising the floor plan below
- Specify insulation to achieve 0.16 W/m²K on the existing roof slopes (0.15 on new roof such as a dormer) and ask the contractor to confirm the U-value calculation in writing
- Check whether Article 4 Directions remove PD rights in your area, and apply for an LDC if works are permitted development
- Serve party wall notices where required, at least two months before work begins for a party structure notice and one month for a line of junction or excavation notice171018
- Get a structural engineer involved from the design stage, not as an afterthought once the builder has started
- Hold a contingency of at least 10% (more on an older house) and do not release it until snagging is complete and Building Control sign-off is issued
References (18)
Figures in this note were checked against the sources below on 2 October 2026. Superscript numbers in the text point to them. Every source the site cites, by topic.
- 1technicalvery strongMinistry of Housing, Communities and Local Government.RN-XH6E39The standard that decides whether a loft ladder is legal and when a raised deck needs a balustrade. Published 3 January 2013, it covers protection from falling, collision and impact including stairs, ladders, ramps, guarding and vehicle barriers. Paragraph 1.31 states that retractable ladders must not be used as a means of escape. Paragraph 1.32 permits a fixed ladder, with fixed handrails on both sides, only for access in a loft conversion containing one habitable room, and only where there is not enough space without altering the existing space for a compliant stair, which is the rule that catches most loft ladder installations. Paragraph 1.29 restricts alternating tread stairs to loft conversions. For a private stair the maximum pitch is 42 degrees (Table 1.1 note 1), the normal relationship between rise and going is twice the rise plus the going between 550mm and 700mm, and for dwellings external tapered steps forming part of the building need a going of at least 280mm. Paragraph 3.1 requires guarding wherever it is reasonably necessary for safety at the edge of a floor, gallery, balcony, roof, light well, basement or similar sunken area. Paragraph 3.2 requires guarding to be at least the height in Diagram 3.1, allows any wall, parapet or balustrade to serve as guarding, and requires it to resist the loads in BS EN 1991-1-1 with its UK National Annex and PD 6688-1-1, with BS 6180 for barrier and infill panel design. Handrails should be positioned 900mm to 1000mm from the pitch line or floor.
- 2technicalvery strongMinistry of Housing, Communities and Local Government.RN-L0FCJXThe in-force U-value tables a DIY insulation or door note must quote, with the exact numbers. Table 4.2, limiting U-values for new fabric elements in existing dwellings, sets roof 0.15, wall 0.18, floor 0.18, swimming pool basin 0.25, window 1.4 or Window Energy Rating Band B minimum, rooflight 2.2, doors with more than 60 per cent of the internal face glazed 1.4 or Doorset Energy Rating Band C minimum, and other doors 1.4 or Doorset Energy Rating Band B minimum. Table 4.3, for existing elements, gives a roof threshold of 0.35 and an improved value of 0.16, which is the figure a loft insulation note needs: paragraph 4.12 says a retained element whose U-value is higher than the column (a) threshold, for example through a loft or garage conversion, should be upgraded to the column (b) value. Paragraph 4.13 allows a lesser upgrade only where the improved value is not technically or functionally feasible or would not achieve a simple payback of 15 years or less. Paragraph 4.8 requires a replacement element to be no worse than the one it replaces as well as meeting Table 4.2. Paragraph 4.10 gives the heritage exception: where character must be maintained, a centre pane U-value of no more than 1.2 or low-emissivity secondary glazing. Note 9 records that the timber window concession of 1.6 or Band C ended on 14 June 2023. The 2021 edition came into force on 15 June 2022; a 2026 edition exists at https://assets.publishing.service.gov.uk/media/69c122a6cfa346b9d4704a55/ADL1_2026.pdf.
- 3technicalvery strongThe National Archives, legislation.RN-OWGIY3Schedule 2 Part 1 of the GPDO 2015, development within the curtilage of a dwellinghouse. This is permitted development itself: Class A enlargement and alteration, with the limits and conditions, through the classes covering roof alterations, porches, outbuildings and hard surfaces. Every statement about what can be built without planning permission traces to this Part, and the exclusions at the start of each class are where most projects actually fall out.
- 4technicalvery strongThe National Archives (legislation.gov.uk), legislation.RN-KHYKNAClass B permits roof enlargements provided the roof space does not increase by more than 40 cubic metres for a terrace house or 50 cubic metres in any other case (B.1(d)), no part exceeds the height of the highest part of the existing roof (B.1(b)) and the work does not extend beyond the plane of any roof slope forming the principal elevation that fronts a highway (B.1(c)). The right is withdrawn on article 2(3) land, including conservation areas, and for houses created under Classes G, M, MA, N, P, PA or Q (B.1(a), (f) to (h)). Conditions in B.2 require materials of similar appearance, an enlargement set back not less than 0.2 metres from the eaves measured along the roof slope, and side-elevation windows that are obscure-glazed and non-opening unless the opening part is more than 1.7 metres above the floor.
- 5technicalvery strongThe National Archives, guidance.RN-04ZPUZGPDO Schedule 1 Part 1, which defines article 2(3) land. It includes conservation areas, areas of outstanding natural beauty and National Parks.
- 6technicalvery strongThe National Archives (legislation.gov.uk), legislation.RN-3LA2VCArticle 4(1) allows the Secretary of State or the local planning authority, where satisfied that it is expedient that development should not be carried out without permission, to direct that the permission granted by article 3 does not apply to all or any development of a Part, Class or paragraph of Schedule 2 in a specified area, or to any particular development. The procedures for making, modifying or cancelling a direction are set out in Schedule 3, and a direction does not affect development for which prior approval was granted before it took effect.
- 7technicalvery strongMinistry of Housing, Communities and Local Government (GOV.UK), a government page.RN-JM9I1NThe schedule of planning application fees in England from 1 April 2026. Fees rise annually with the September CPI under the 2023 amendment regulations; September 2025 CPI was 3.8%, so every fee from April 2025 rose by that and is charged from 1 April 2026. The table lists the new amount for each application type, which is the statutory figure a council must charge rather than a guide price.
- 8technicalvery strongThe National Archives, guidance.RN-ZRVGWJthe period a local planning authority has to determine an application for a certificate of lawfulness
- 9costvery strongPlanning Portal, guidance.RN-M2KUCTA price, true at 2026-04. The Planning Portal's consolidated guide to planning application fees in England from 1 April 2026, built from the 2012 fees regulations as amended and MHCLG's annual indexation. More usable than the regulations themselves because it puts each application type next to its current fee and its definition. The statutory amounts are in the regulations; this is the readable index to them.
- 10technicalvery strongThe National Archives (legislation.gov.uk), legislation.RN-QBUTY2The exact wording of the two excavation triggers that decide whether a basement or a deep foundation needs a party wall notice, worth quoting rather than paraphrasing. Section 6(1) applies where the building owner proposes to excavate, or excavate for and erect a building or structure, within a distance of 3 metres measured horizontally from any part of a building or structure of an adjoining owner, and the excavation will within those 3 metres extend to a lower level than the level of the bottom of the neighbour's foundations. Section 6(2) applies within 6 metres measured horizontally where the work will within those 6 metres meet a plane drawn downwards in the direction of the excavation at an angle of 45 degrees to the horizontal. Section 6(5) requires the building owner to serve notice on the adjoining owner at least one month before beginning to excavate. Section 6(7) provides that if the adjoining owner does not serve a notice indicating consent within 14 days, they are deemed to have dissented and a dispute has arisen, which is what triggers the surveyor and award process.
- 11technicalvery strongMinistry of Housing, Communities and Local Government, guidance.RN-EUGGMVMHCLG's official explanatory booklet on the Party Wall etc. Act 1996, applying to England and Wales, Crown copyright 2016. Explains the Act's effect on the Building Owner who wishes to carry out work covered by the Act and the Adjoining Owner who receives notice of it. Defines 'owner' for the Act's purposes as including anyone holding the freehold title, holding a leasehold title for a period exceeding one year, under contract to purchase such a title, or entitled to receive rents from the property, so a single property can have more than one owner. States clearly that the Act is separate from planning and building regulations control: agreement under the Act does not remove the need for planning permission or building regulations compliance, and neither does planning permission or building regulations compliance remove the need to comply with the Act. Carries a disclaimer that the booklet is a general guide and not an authoritative interpretation of the law.
- 12technicalfairHomeOwners Alliance, guidance.RN-XA4DWQHomeOwners Alliance on party wall surveyor costs in 2026: what an award costs, what pushes it up, and the rule that the building owner doing the work normally pays both sides' surveyors. That last point is the one homeowners are caught by, and it is the reason a neighbour appointing their own surveyor is a cost to the person building.
- 13costsupplier figurePrince Surveyors.RN-GH1Z2FA price, true at 2026-09. an RICS, CIOB and RPSA accredited surveying practice on what party wall work costs in London and the home counties: £90 to £250 an hour, with a straightforward single-notice matter often settling between £700 and £1,500 in total, and the final figure turning on how many adjoining owners are involved. It is the second of the two practices the cost book's party wall fee is built from, and the wider of the two ranges
- 14technicalsupplier figureVELUX.RN-HF2FVEThe manufacturer's own size code table, the only reliable source for what a Velux code means. Pitched roof window codes and dimensions include FK06 at 66cm by 118cm, MK04 at 78cm by 98cm, MK06 at 78cm by 118cm, MK08 at 78cm by 140cm, PK06 at 94cm by 118cm, PK08 at 94cm by 140cm, SK06 at 114cm by 118cm, SK08 at 114cm by 140cm, UK04 at 134cm by 98cm and UK08 at 134cm by 140cm. Flat roof window sizes run from 60cm by 60cm up to 150cm by 150cm and 200cm by 100cm. The first letter pair gives the width band and the digits the height, which is the pattern a size-code note should explain.
- 15technicalvery strongHealth and Safety Executive, guidance.RN-5PLWW8HSE's asbestos frequently asked questions: the health risks, which work is licensed and which is not, what a householder may and may not do themselves, and where the free HSE publications are. The quickest authoritative answer to whether a particular job needs a licensed contractor.
- 16technicalfairWhich?, guidance.RN-5XVH97Which? loft conversion costing, updated 24 April 2026, using Building Cost Information Service data from 2025 with VAT included. Benchmarks a small conversion as 4 x 5 metres with two windows and a large conversion as 12 x 7 metres with four windows. Gives the budget split: labour 35 to 40%, materials 25 to 30%, fixtures and fittings 10 to 15%, planning and permissions up to 5%, and a contingency of no less than 10%, raised to 15 to 20% where structural work is involved. On value, a 2025 Nationwide report is cited: a loft conversion can add up to 24% to a property's value, a 10% increase in floor space adds about 5% to the price of a typical house, and adding a large double bedroom of about 13 m2 plus a bathroom to a three bedroom one bathroom house can add as much as 24%. On buildability, houses built before 1970 usually have open self supporting rafters and are easier to convert, while houses built after about 1970 tend to have trussed roofs, which need more structural work and can double the cost. Most conversions fall under permitted development, but an application where needed can cost up to £1,000.
- 17technicalvery strongThe National Archives (legislation.gov.uk), legislation.RN-8KXE9KThe section that catches a garden wall built on or up to the boundary, which most homeowners assume the Party Wall Act does not reach. Section 1 applies where lands of different owners adjoin and are either not built on at the line of junction, or are built on only to the extent of a boundary wall that is not a party fence wall or the external wall of a building, and either owner is about to build on any part of the line of junction. Section 1(2) requires a building owner who wants to build a party wall or party fence wall on the line of junction to serve notice on the adjoining owner at least one month before the work is intended to start, describing the intended wall. If the adjoining owner consents under section 1(3), the wall is built half on each owner's land or as otherwise agreed and the cost is shared; the section extends to England and Wales only.
- 18technicalvery strongThe National Archives (legislation.gov.uk), legislation.RN-C6XFB7A party structure notice must be served at least two months before the date on which the proposed work will begin, and must state the building owner's name and address, the nature and particulars of the proposed work (with plans, sections and load particulars where special foundations are proposed) and the date the work will begin. The notice ceases to have effect if the work has not begun within twelve months of service or is not then prosecuted with due diligence. Two months for a party structure notice against one month for a section 6 excavation notice is the distinction to cite.
-
Approved Document K, Protection from falling, collision and impact, 2013 edition, Ministry of Housing, Communities and Local Government, accessed 9 September 2026. assets.publishing.service.gov.uk
-
Approved Document L, Conservation of fuel and power, Volume 1: Dwellings, 2021 edition incorporating 2023 amendments, HM Government, accessed 7 September 2026. assets.publishing.service.gov.uk
-
The Town and Country Planning (General Permitted Development) (England) Order 2015, Schedule 2, Part 1, The National Archives, accessed 14 September 2026. legislation.gov.uk
-
Class B – additions etc. to the roof of a dwellinghouse – The Town and Country Planning (General Permitted Development) (England) Order 2015, legislation.gov.uk, accessed 12 September 2026. legislation.gov.uk
-
The Town and Country Planning (General Permitted Development) (England) Order 2015, Schedule 1, Part 1: Article 2(3) land, The National Archives, accessed 30 September 2026. legislation.gov.uk
-
The Town and Country Planning (General Permitted Development) (England) Order 2015, article 4: Directions restricting permitted development, The National Archives (legislation.gov.uk), accessed 2 October 2026. legislation.gov.uk
-
Fees for planning applications in England from 1 April 2026, Ministry of Housing, Communities and Local Government (GOV.UK), accessed 30 September 2026. assets.publishing.service.gov.uk
-
The Town and Country Planning (Development Management Procedure) (England) Order 2015, article 39: Certificate of lawful use or development, The National Archives, accessed 30 September 2026. legislation.gov.uk
-
A guide to fees for Planning Applications in England, 1 April 2026, V2026, Planning Portal, accessed 30 September 2026. Priced at 2026-04, so no calibration is needed. ecab.planningportal.co.uk
-
Party Wall etc. Act 1996, section 6, legislation.gov.uk, accessed 9 September 2026. legislation.gov.uk
-
The Party Wall etc. Act 1996: explanatory booklet, Ministry of Housing, Communities and Local Government (GOV.UK), accessed 30 September 2026. gov.uk
-
Party Wall Surveyor Costs 2026, HomeOwners Alliance, accessed 12 September 2026. hoa.org.uk
-
Party Wall Surveyor Cost 2026: Fees & Who Pays, Prince Surveyors, accessed 2 October 2026. Priced at 2026-09, so no calibration is needed. princesurveyors.co.uk
-
VELUX Roof window sizes: Find the right fit for your home, VELUX, accessed 30 September 2026. velux.co.uk
-
Asbestos: frequently asked questions, Health and Safety Executive, accessed 30 September 2026. hse.gov.uk
-
How much does a loft conversion cost in 2026? - Which?, Which?, accessed 12 September 2026. which.co.uk
-
Party Wall etc. Act 1996, section 1: New building on line of junction, The National Archives (legislation.gov.uk), accessed 2 October 2026. legislation.gov.uk
-
Section 3 – Party Wall etc. Act 1996, The National Archives / legislation.gov.uk, accessed 12 September 2026. legislation.gov.uk