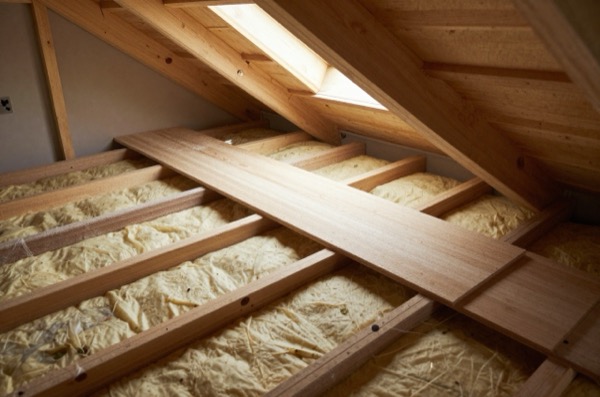
“Loft flooring” and “loft boarding” are often used interchangeably, but there is a subtle difference worth understanding before you buy. Loft boarding is the act of installing a floor surface in the loft. Loft flooring refers to the boards themselves, the material choice, dimensions and whether they are designed specifically for loft use or are adapted from general-purpose sheet materials. This guide focuses on the flooring materials in detail, alongside installation method, load limits and cost.
Board Types for Loft Flooring
1. Tongue-and-Groove Chipboard (Standard Flooring Grade)
The most common sheet material used in domestic loft floors. Standard flooring-grade chipboard is 18 mm thick, 2,400 × 600 mm, and costs approximately £12–£18 per sheet. Each sheet covers 1.44 m², so that is about £8–£12.50 per m². Grade P5 is the usual choice for lofts: the P5 classification refers to the moisture resistance of the adhesive, not to the board being waterproof.1
Advantages: widely available, cheap, the tongue-and-groove joint means boards support each other laterally and there is no flex at the joint under foot. Screws well to supporting joists or loft legs.
Disadvantages: standard sheets are large (2,400 mm long) and awkward to manoeuvre through a standard hatch opening. You will typically need to cut them to 600 × 600 mm or 900 × 600 mm sections to get them through the hatch, losing some material as off-cuts.
2. Purpose-Made Loft Panels
Sold as pre-cut panels, usually tongue-and-grooved, sized to pass through a standard hatch opening. A common size is 1,220 × 320 × 18 mm, which covers about 0.39 m² per panel.2
Most are 18 mm thick and far easier to handle in a loft than full sheets, but some are sold for storage only: Selco describes its loft packs as non-structural and not for use as flooring.3
Cost: a pack of three 1,220 × 320 mm panels (about 1.17 m²) is about £16 at the big DIY chains, roughly £14 per m², slightly more expensive than cutting down standard sheets, but the convenience is worth it for most homeowners.4
3. OSB (Oriented Strand Board)
Sometimes suggested as an alternative to chipboard. OSB is stiffer along one axis, so it must be laid with its strong direction spanning the supports, but it performs similarly to chipboard for light storage.1 It costs about £17–£20 per 2,400 × 590 mm tongue-and-groove board: Selco lists an 18 mm SterlingOSB Zero board at £17.40 including VAT.5 Not usually sold in pre-cut loft panels. Suitable for loft use but offers no real advantage over chipboard.
4. Plywood (12 or 18 mm)
Structural plywood is stiffer and stronger than chipboard for a given thickness and is often preferred where higher loads are anticipated. At 18 mm, a 2,440 × 1,220 mm sheet costs about £25–£40: Selco lists general-purpose 18 mm plywood at £32.22 including VAT.6 The main disadvantage is cost: per square metre it is typically somewhat dearer than chipboard. It is worth considering for a loft that will store genuinely heavy items (tools, archive boxes, car parts) or where the span between supports is over 600 mm.
Board Thickness and Span
The required board thickness depends on the spacing of the supports beneath. For loft legs or battens fixed directly to each joist:
| Support spacing | Minimum board thickness |
|---|---|
| 400 mm centres | 18 mm chipboard or 15 mm plywood |
| 450 mm centres | 18 mm chipboard or 15 mm plywood |
| 600 mm centres | 22 mm chipboard or 18 mm plywood |
| 800 mm centres | Not recommended; add intermediate supports |
These figures follow LABC Warranty’s guidance for domestic floor decks, which gives 18 mm particleboard on supports at up to 450 mm centres and 22 mm at up to 600 mm, with plywood at 15 mm and 18 mm respectively.1
Ceiling joists in traditional cut roofs are usually at 400 mm or 450 mm centres, and trussed rafters at 600 mm.7 If loft legs are fixed to every joist, the support centres match the joist spacing. If legs are spaced further apart, increase board thickness accordingly.
Why Boards Must Be Raised Above Insulation
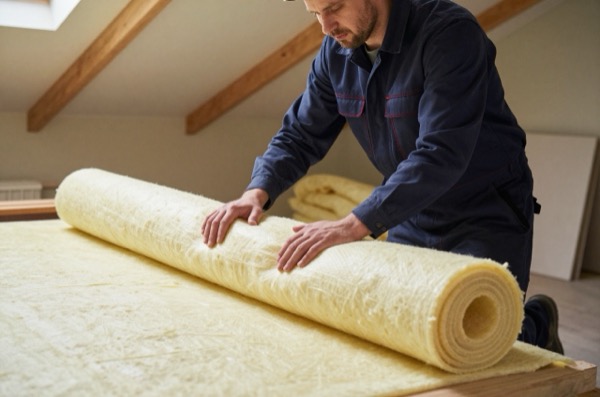
This is the most critical point in loft flooring. Laying boards directly on top of mineral wool insulation compresses the fibres.8 Mineral wool performs because it traps still air within a network of fibres. Compression reduces the air pockets and dramatically increases thermal conductivity.
A 270 mm deep loft insulation installation (the depth commonly recommended in the UK) squashed to 75 mm by flat-laid boards loses most of its value: at a typical conductivity of 0.040 W/mK the full layer gives a thermal resistance of about R = 6.75 m²K/W, and compressed to 75 mm it gives only around R = 2–2.5 m²K/W, even allowing for the denser fibres.8 That increases heat loss through the loft by a significant margin.
The solution is to raise the boards on proprietary loft legs or timber battens fixed to the top of the joists. One widely used product, the Loft Leg, raises boards by 175 mm, which clears 270 mm of insulation when fixed on top of a 100 mm joist.9 This maintains a clear air gap between the underside of the boards and the top of the insulation, allowing the insulation to remain at full depth and full performance.
Load Limits: What Can a Loft Floor Take?
The load capacity of a loft floor depends on two things: the structural capacity of the joists beneath, and the spanning capacity of the boards above.
Ceiling joists are sized for the ceiling below them and very little else. Timber Development UK’s span tables size domestic ceiling joists for an imposed load of 0.25 kN/m², about 25 kg per square metre, or a single 0.9 kN point load, against 1.5 kN/m² for a floor.10
That is sufficient for typical loft storage (seasonal boxes, suitcases, soft furnishings) but inadequate for heavy archive files, car parts, water tanks or large tool collections. If in doubt, have the joist sizes confirmed against a structural engineer’s assessment before loading.
A loaded loft floor with standard insulation and loft legs can handle most domestic storage comfortably. Avoid:
- Storing liquids in heavy containers
- Heavy gym equipment or weights
- Full archive boxes concentrated in one small area
- Water tanks (these require dedicated structural support)
DIY Installation: Step by Step
Materials Needed
- Loft legs or timber battens (see separate guide for fixing method)
- 18 mm T&G chipboard loft panels or cut-down flooring grade chipboard
- 50 mm chipboard screws
- Drill, 3 mm pilot drill bit
- Tape measure and pencil
- Saw (if trimming sheets to size)
- Knee pads and headtorch
Step 1: Fix the Loft Legs or Battens
Screw loft legs to the joists at no more than 600 mm centres, with legs along each joist wherever board edges meet; with 320 mm wide loft panels that means a leg roughly every 320 mm.11 Alternatively, fix treated timber bearers across the joists, deep enough for the boards to clear your insulation. All fixings must go into timber, not between joists into plasterboard.
Step 2: Lay the First Board
Start from the hatch edge and work inward. Engage the tongue of the first panel into the groove of the adjacent panel (or butt-joint square-edged sheets with a 3 mm gap between boards, supporting every edge on a leg, batten or noggin).1 Keep a board under your knees at all times.
Step 3: Fix to Legs or Battens
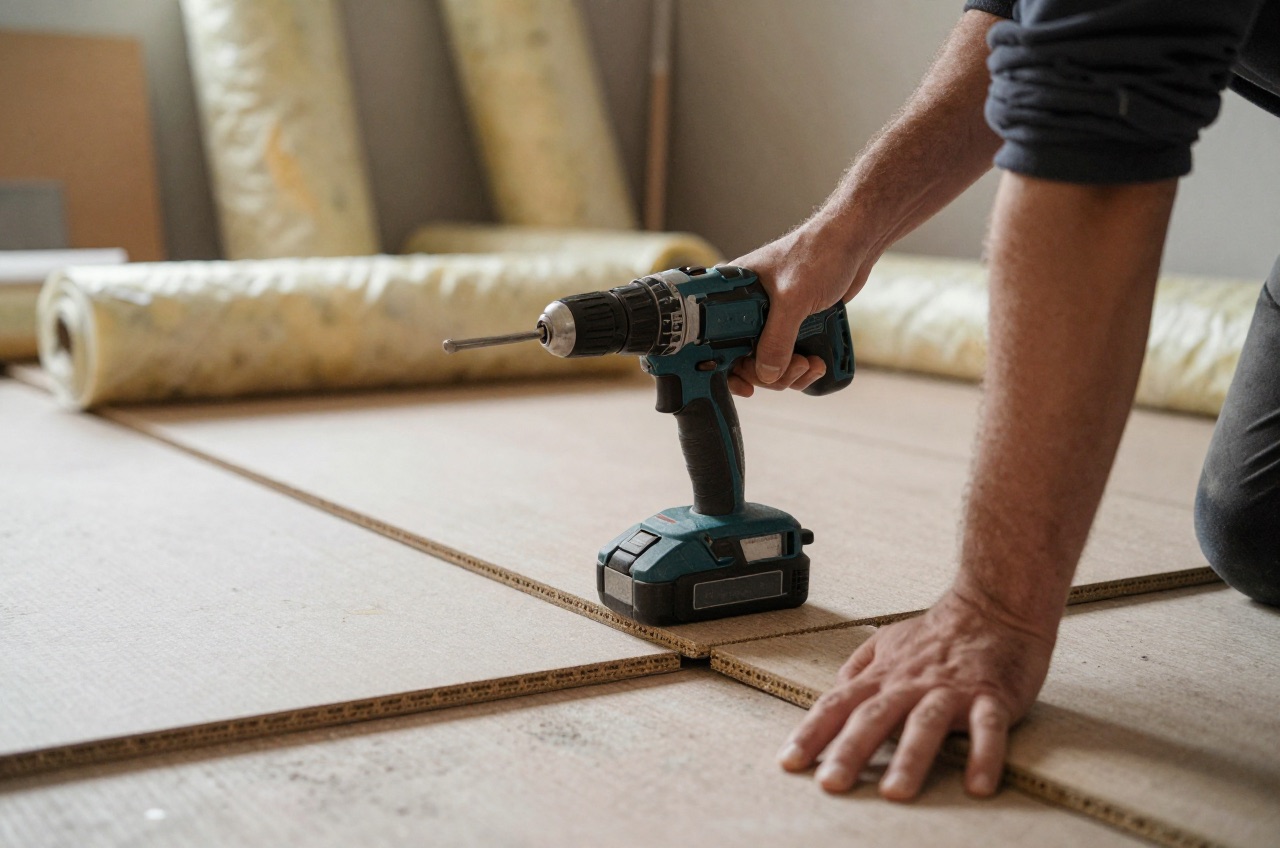
Pre-drill pilot holes and screw each board down to the loft legs or battens below. Screwing at every leg point prevents lateral movement and squeaking.
Step 4: Continue Working Across the Loft
Stagger the joints on adjacent rows (like brickwork) so no continuous joint runs across the floor.1 This improves stiffness and reduces the chance of board edges lifting.
Step 5: Nosing at Hatch Edge
Fit a 75 × 18 mm planed timber nosing across the hatch-edge of the floor. This gives a clean visible edge and prevents the board end from chipping when you step onto it from the ladder.
Cost Summary
| Scenario | Approximate cost |
|---|---|
| Materials only: loft panels + legs, 25 m² | £575–£700 |
| Materials only: cut chipboard + timber battens, 25 m² | £225–£390 |
| Professional supply and fit on loft legs, 25 m² | about £575–£1,350 |
| Professional supply and fit on loft legs, 40 m² | about £1,000–£2,100 |
The professional figures are estimates: chipboard or loft panels on loft legs, plus one to two days of a carpenter’s time for 25 m² or two to three days for 40 m², at roughly £245–£335 a day.
DIY materials per m²:
- Standard flooring chipboard (cut to size): £8–£12.50/m²
- Purpose-made loft panels: about £14/m²
- Loft legs: about £5–£14/m², depending on board size and joist spacing
- Timber battens alternative: £1–£3/m²
A pack of 12 Loft Legs costs about £21, and 320 mm loft panels on joists at 400 mm centres need about eight legs per square metre, while 600 mm wide sheets on 600 mm joists need about three.12
Loft Flooring vs Full Conversion Floor
A loft storage floor is designed to support light intermittent loads and is not a structural floor. A loft conversion floor, for a habitable room, must comply with Building Regulations Part A for structural adequacy and Part E for sound insulation.1314
Conversion floors are almost always constructed from new joists (typically 200 × 50 mm or 220 × 50 mm, deeper than the original ceiling joists), with acoustic quilt between them and 22 mm T&G flooring above. The cost difference is substantial: a conversion floor costs £25–£50/m² in materials alone, versus roughly £9–£28/m² for a simple raised storage floor. If you are planning a future loft conversion, it may be worth fitting the deeper joists now and using the loft as storage in the interim.
References (14)
Figures in this note were checked against the sources below on 2 October 2026. Superscript numbers in the text point to them. Every source the site cites, by topic.
- 1technicalfairLABC Warranty, guidance.RN-WLOT6ZA new-home warranty provider's technical guidance on domestic floor decks; it explains that the P5 and P7 particleboard grades describe adhesive moisture resistance, not waterproofing.
- 2technicalsupplier figureJewson, guidance.RN-K87XN6A national builders' merchant's product page for a standard tongue-and-groove chipboard loft panel; it confirms the 1,220 x 320 x 18 mm size. Used only for the product dimension.
- 3technicalsupplier figureSelco Builders Warehouse, guidance.RN-LSS6PVSelco's product page for an 18 mm, 1,220 × 320 mm chipboard loft pack. It says the panels are non-structural, for loft storage, and should not be used for flooring.
- 4costsupplier figureB&Q.RN-GGK1VOA price, true at 2026-09. B&Q's product page for a pack of three 1,220 × 320 × 18 mm chipboard loft panels, priced at £16.47, which it states as £14.06 per m².
- 5costsupplier figureSelco Builders Warehouse.RN-F64QK4A price, true at 2026-09. the retail price Selco Builders Warehouse publishes for SterlingOSB Zero T&G Board 2400 x 590 x 18mm TG4 FSC, which is the supply figure the cost book records for this item
- 6costsupplier figureSelco Builders Warehouse.RN-H6BZN1A price, true at 2026-09. Selco's product page for a 2,440 × 1,220 × 18 mm general-purpose hardwood plywood sheet, listed at £32.22 including VAT, inside the note's £25–£40 range.
- 7technicalfairTrussed Rafter Association, guidance.RN-19KM26The Trussed Rafter Association's installation guidance. Its erection sequence requires all specified longitudinal, diagonal and chevron bracing to be fixed, with galvanised retaining straps to walls and gable ends.
- 8technicalfairEnergy Saving Trust, guidance.RN-I69XGOEnergy Saving Trust's consumer advice page on roof and loft insulation: recommended depths, the difference between insulating at joist level and at rafter level, and indicative costs and savings. EST is a consumer-facing body rather than the authority for the depth, so it is cited for the plain explanation and Approved Document L is cited for the requirement. The page blocks automated fetching, so it is described here from its title and publisher.
- 9technicalsupplier figureLoft Leg Ltd, guidance.RN-HLEMFBThe manufacturer's product page for the Loft Leg raised-floor support; it states the 175 mm raise and that on a 100 mm joist it clears 270 mm of quilt insulation. Used only for the product dimension.
- 10technicalfairTimber Development UK, published by Taylor Maxwell, guidance.RN-KDN35UTimber Development UK's 2023 span tables for C16 solid timber members in dwellings, calculated to Eurocode 5: maximum clear spans of domestic floor joists, ceiling joists and flat roof joists by section, spacing and dead load.
- 11technicalsupplier figureLoft Leg Ltd, guidance.RN-WSV626The maker's installation FAQ for Loft Legs. It sets legs at no more than 600 mm centres, with legs where boards meet, and a 320 mm grid for 320 mm wide boards.
- 12costsupplier figureToolstation.RN-UYJZ23A price, true at 2026-09. A national merchant's product page for the Loft Leg 175 mm 12-pack. It settles the current retail price of £20.99 a pack, about £1.75 per leg.
- 13technicalvery strongMinistry of Housing, Communities and Local Government.RN-35VE7WTable 0.1a sets separating element performance for dwellings: purpose built walls a minimum 45 dB DnT,w + Ctr, floors and stairs 45 dB airborne and a maximum 62 dB L'nT,w impact; where a dwelling is formed by material change of use the figures relax to 43 dB airborne and 64 dB impact. Table 0.2 sets the laboratory value for new internal walls and floors within a dwelling at a minimum 40 dB Rw. Requirement E2 covers internal walls between a bedroom or a room containing a WC and other rooms, and internal floors, but expressly does not apply to an internal wall containing a door, a wall separating an en suite toilet from its own bedroom, or existing walls and floors in a material change of use. Section 5 gives internal wall types A to D and internal floor types A to C, including timber or metal stud with plasterboard and mineral wool; paragraph 5.14 requires all gaps around internal walls to be filled.
- 14technicalvery strongMinistry of Housing, Communities and Local Government (GOV.UK).RN-Z6AXUWThe full Approved Document A PDF, which carries the deemed-to-satisfy tables a domestic project is checked against. Section 2E covers foundations of plain concrete: paragraph 2E3 gives the recommended minimum widths of strip foundations in Table 10, keyed to ground type and total load of loadbearing walling per linear metre. Table 10 sets, for rock (not inferior to sandstone, limestone or firm chalk, requiring at least a pneumatic or mechanically operated pick to excavate), a width equal to the width of the wall at every load. For medium dense gravel or sand (requires a pick to excavate, a 50mm square wooden peg hard to drive beyond 150mm) and for stiff clay or stiff sandy clay (can be indented slightly by the thumb), the minimum widths are 250mm at 20 kN per linear metre, 300mm at 30, 400mm at 40, 500mm at 50, 600mm at 60 and 650mm at 70. Firm clay and firm sandy clay (thumb makes an impression easily) start at 300mm. The document also covers minimum depth of strip foundations, wall thickness rules for residential buildings up to three storeys (paragraph 2C10 covers internal loadbearing walls in brickwork or blockwork), buttressing, lateral support by floors and at roof level, interruption of lateral support, wall cladding in Section 3, and Section 5 on reducing sensitivity to disproportionate collapse with the building consequence classes.
-
Technical update: Floor decks, timber fixing requirements in domestic locations, LABC Warranty, accessed 30 September 2026. labcwarranty.co.uk
-
Chipboard Loft Panel 1220 x 320 x 18mm, Jewson, accessed 30 September 2026. jewson.co.uk
-
Chipboard Loft Pack 18mm Pack of 3 FSC, Selco Builders Warehouse, accessed 2 October 2026. selcobw.com
-
Natural Chipboard Loft panel (L)1220mm (W)320mm (T)18mm, Pack of 3, B&Q, accessed 2 October 2026. Priced at 2026-09 and left there. diy.com
-
SterlingOSB Zero T&G Board 2400 x 590 x 18mm TG4 FSC, Selco Builders Warehouse, accessed 2 October 2026. Priced at 2026-09 and left there. selcobw.com
-
General Purpose Plywood 2440 x 1220 x 18mm, Selco Builders Warehouse, accessed 2 October 2026. Priced at 2026-09 and left there. selcobw.com
-
Introduction to the storage and installation of trussed rafters on site, Trussed Rafter Association, accessed 2 October 2026. tra.org.uk
-
Roof and loft insulation, Energy Saving Trust, accessed 2 October 2026. energysavingtrust.org.uk
-
Loft Leg: Loft Flooring Leg, Loft Leg Ltd, accessed 30 September 2026. loftleg.com
-
C16 Span Tables, Timber Development UK, published by Taylor Maxwell, accessed 29 September 2026. taylormaxwell.co.uk
-
28 Common Questions About Loft Legs, Loft Leg Ltd, accessed 2 October 2026. loftleg.com
-
Loft Flooring Legs 175mm, Toolstation, accessed 2 October 2026. Priced at 2026-09 and left there. toolstation.com
-
Approved Document E: Resistance to the passage of sound, 2003 edition incorporating 2004, 2010, 2013 and 2015 amendments, HM Government (GOV.UK), accessed 30 September 2026. assets.publishing.service.gov.uk
-
Approved Document A, Structure, 2004 edition incorporating 2004, 2010 and 2013 amendments, Ministry of Housing, Communities and Local Government, accessed 14 September 2026. assets.publishing.service.gov.uk