A poorly insulated garage loses heat rapidly, making it cold in winter, uncomfortably hot in summer, and wasteful if you use it as anything other than basic car storage. Whether you’re converting a garage to living space, setting up a home gym or workshop, or simply want to stop heat bleeding out through an attached garage wall, insulation makes a real difference.
This guide covers the three main zones, roof, walls, and floor, their respective material options, 2026 costs, and the Building Regulations position.
Do You Need Building Regulations Approval?
This depends on what you’re doing:
- Insulating an attached garage that’s already in use as part of the house (e.g., a garage room): there is no change of use, but adding insulation to an outside wall, floor or roof is treated as renovating a thermal element, as described for the house wall below.
- Converting a garage to a habitable room: this will normally require Building Regulations approval, and the converted room has to meet the relevant requirements, including Part L (thermal performance), Part F (ventilation) and Part B (fire safety).1
- Insulating a detached garage: no Building Regulations required unless you’re converting it to living space.
- Insulating the wall between an attached garage and the house: that wall separates the heated house from an unheated garage, so the Building Regulations treat it as a thermal element.2 Adding a layer of insulation counts as renovating it, and where more than 50% of the wall’s area is renovated the whole wall has to meet Approved Document L and the work is notifiable building work, so check with building control before starting.34
If in doubt, contact your local authority building control (LABC) before starting.
Zone 1: Roof / Ceiling Insulation
The roof is usually where most heat is lost, especially in a single-skin concrete or metal-roofed garage. It’s also typically the easiest place to add insulation without major structural work.
Option A: Rafter/joist insulation above a flat ceiling
If the garage has a flat ceiling (plasterboard or similar) with a void above, you can lay mineral wool quilt or rigid board in the void.
- 100 mm mineral wool quilt (e.g., Knauf Earthwool, Rockwool RollBatt): £2.50–£4/m²
- 100 mm rigid PIR board (Celotex, Kingspan): about £16–£20/m²; Wickes sells a 2400 × 1200 × 100 mm Kingspan TP10 board, covering 2.88 m², for £55.56
A garage ceiling of 20 m² fitted with 150 mm mineral wool costs approximately £80–£120 in materials, easily a half-day DIY job.
Option B: Rafters lined with rigid insulation (pitched roof or directly under roof covering)
Where there’s no ceiling void, rigid PIR boards can be fitted between or below roof timbers.
- 50 mm PIR board (between rafters): approximately £8–£14/m²
- 25 mm PIR board (continuous layer under rafters, to eliminate cold bridges): £5–£10/m²
For best performance, a two-layer approach (between rafters + a continuous layer below) minimises cold bridging.
Option C: Spray foam (not recommended)
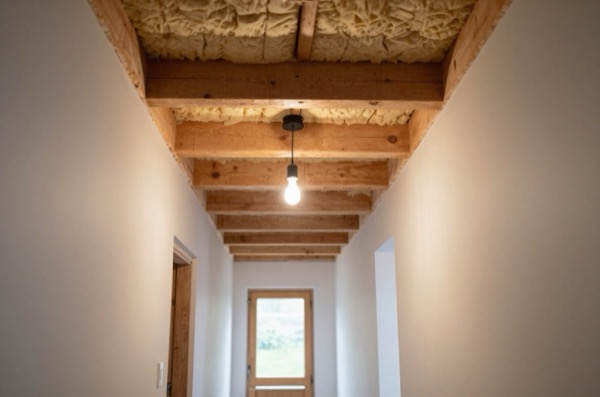
Spray foam has been used for garage roof insulation but has significant downsides: it can trap moisture in timber, is difficult to remove, and, importantly for UK homeowners, some mortgage lenders will not advance funds on properties where spray foam has been used.7 Avoid for any space that may eventually be mortgaged or sold.
Zone 2: Wall Insulation
Garage walls are typically:
- Single-skin brickwork (common in older attached and integral garages)
- Concrete block (common in detached garages)
- Timber frame with cladding (some modern garages)
For all types, the practical options are internal insulation (losing a small amount of internal space) or, where accessible, external insulation.
Internal wall insulation options:
| Method | Approximate Cost per m² (Materials) | Typical Thickness |
|---|---|---|
| Rigid PIR board, tape joints, skim | £15–£30/m² | 40–100 mm |
| Insulated plasterboard (PIR-backed) | £20–£40/m² | 40–72 mm |
| Stud frame with mineral wool + plasterboard | £12–£22/m² | 75–100 mm + frame |
For a non-habitable garage workshop or gym, you don’t need to skim to a domestic finish, foil-faced PIR board taped at joints can be left exposed. This saves cost and keeps the job DIY-accessible.
For a garage that will be converted to a habitable room (bedroom, office, playroom), the walls must achieve the standards in Approved Document L, 0.30 W/m²K for a renovated wall insulated internally or externally in England, under Table 4.3 of Approved Document L8, which typically requires 80–100 mm of PIR or 125 mm of mineral wool.
Zone 3: Floor Insulation
Concrete garage floors are a significant source of cold in winter. If the floor will see regular use (workshop, gym, home office), floor insulation makes a noticeable difference in comfort.
Option A: Rigid insulation under a new screed
This is the highest-performance solution but requires raising the floor level by at least 100–150 mm (insulation + screed) and is only practical if ceiling height allows.
- 75 mm PIR board under 65 mm screed: materials approximately £40–£65/m²
- Total inc. labour (if screeding professionally): £80–£140/m²
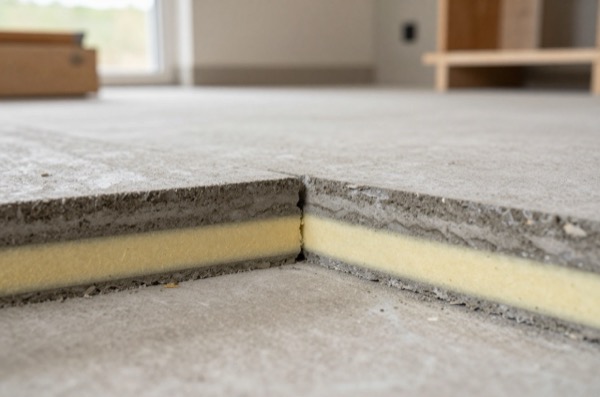
Option B: Insulation board under a floating chipboard deck (e.g., Jablite EPS board)
Rigid EPS or PIR insulation boards laid directly on the existing slab, with a floating chipboard deck (or chipboard-faced insulated panels) on top, then finished with flooring. The rise is typically 45–100 mm, depending on the insulation thickness.
- Cost: £15–£30/m² for panels + chosen floor finish
- DIY-friendly; achievable over a weekend for a standard single garage
Option C: None / accept cold floor
For a garage used purely for car storage, floor insulation is rarely worthwhile. Thermal mats or rubber gym flooring offer minimal insulation but improve comfort without significant cost.
Garage Door Insulation
An uninsulated steel garage door is the biggest thermal weak point in most garages. If replacing the door is not in the budget, a lined insulation kit is available:
- Reflective foil-faced bubble wrap insulation kits (DIY, fits between door ribs): £30–£90 per door
- PIR board cut-to-fit (better performance, more work): £50–£150 per door
A replacement insulated sectional garage door for a single garage typically costs about £1,900–£3,500 supplied and fitted, the upper end with an electric operator. Hörmann’s recommended retail price for its RenoMatic insulated sectional door with an electric operator starts at £1,847, excluding VAT and fitting, in its campaign sizes.9 Good ones insulate well: Hörmann quotes a U-value of 1.0 W/m²K for its LPU 67 Thermo sectional door, measured on a 5000 × 2125 mm door, whereas a single-skin steel door has no insulation at all.10 In a heated garage it cuts heat loss, although at this price the energy saving alone is unlikely to repay it quickly.
Cost Summary: Typical Single Garage
| Scope | DIY Materials | Professional Installed |
|---|---|---|
| Ceiling only (150 mm mineral wool, 20 m²) | £80–£120 | £300–£500 |
| Walls only (PIR board, 4 walls ~40 m²) | £600–£1,200 | £1,400–£2,800 |
| Floor (EPS panels, 20 m²) | £300–£600 | £600–£1,200 |
| Door upgrade (insulation kit) | £50–£150 | £100–£250 |
| Full package (all zones) | £1,030–£2,070 | £2,400–£4,750 |
Practical Tips
- Ventilation: insulating a garage tightly without ventilation can lead to condensation problems. Add a trickle vent or background ventilation if the garage will be regularly occupied or if moisture-generating activities (washing, painting) will happen inside.
- Vapour control: in most garage-to-habitable-room conversions, a vapour control layer (VCL) should be installed on the warm side of the insulation to prevent condensation within the insulation layer.
- Work from the outside in: always insulate the roof/ceiling first (heat rises), then walls, then floor. Doing it in this order lets you assess the improvement before spending money on each subsequent zone.
- Material choice for damp garages: if the garage is prone to damp, cure the damp first, then prefer foil-faced PIR board, which resists moisture, to mineral wool, which loses much of its performance if it gets wet.
References (10)
Figures in this note were checked against the sources below on 30 September 2026. Superscript numbers in the text point to them. Every source the site cites, by topic.
- 1technicalvery strongPlanning Portal, guidance.RN-R9811UThe Planning Portal's guidance on building regulations for garage conversions: converting a garage into habitable space normally needs approval, with notes on infilling the garage door, floors, walls below ground level and ventilation.
- 2technicalvery strongThe National Archives (legislation.gov.uk), guidance.RN-LHGIK5Regulation 2(3) defines a thermal element as a wall, floor or roof separating conditioned space from outside or from an unconditioned part of the building.
- 3technicalvery strongThe National Archives, legislation.RN-ZCMRHVRegulation 3 of the Building Regulations 2010, the meaning of building work. Lists what counts: erecting or extending a building, providing or extending a controlled service or fitting, material alteration, work required by a material change of use, and inserting insulation into a cavity wall. If a job is not on this list it is not building work, so this is the first place to check whether approval is needed at all.
- 4technicalvery strongThe National Archives, guidance.RN-8USAEIthe regulation that brings external wall insulation on an existing house within Part L
- 5costsupplier figureWickes, guidance.RN-046U8FA price, true at 2026-09. A retailer product page for a 100 mm Kingspan TP10 PIR pitched-roof board. It gives the board size, coverage, declared thermal conductivity and current price.
- 6costsupplier figureWickes.RN-WUVD44A price, true at 2026-09. Wickes's published price for the item the cost register files as "pIR rigid insulation board, 2400 x 1200 mm, supply only, by thickness", which is the figure a cost footnote on this page points at.
- 7technicalvery strongHouse of Commons Library, guidance.RN-G7QNC8A House of Commons Library briefing on spray foam insulation and mortgages in England. It summarises lender refusals, surveyors' inspection difficulties and the industry guidance issued since 2023.
- 8technicalvery strongMinistry of Housing, Communities and Local Government.RN-L0FCJXThe in-force U-value tables a DIY insulation or door note must quote, with the exact numbers. Table 4.2, limiting U-values for new fabric elements in existing dwellings, sets roof 0.15, wall 0.18, floor 0.18, swimming pool basin 0.25, window 1.4 or Window Energy Rating Band B minimum, rooflight 2.2, doors with more than 60 per cent of the internal face glazed 1.4 or Doorset Energy Rating Band C minimum, and other doors 1.4 or Doorset Energy Rating Band B minimum. Table 4.3, for existing elements, gives a roof threshold of 0.35 and an improved value of 0.16, which is the figure a loft insulation note needs: paragraph 4.12 says a retained element whose U-value is higher than the column (a) threshold, for example through a loft or garage conversion, should be upgraded to the column (b) value. Paragraph 4.13 allows a lesser upgrade only where the improved value is not technically or functionally feasible or would not achieve a simple payback of 15 years or less. Paragraph 4.8 requires a replacement element to be no worse than the one it replaces as well as meeting Table 4.2. Paragraph 4.10 gives the heritage exception: where character must be maintained, a centre pane U-value of no more than 1.2 or low-emissivity secondary glazing. Note 9 records that the timber window concession of 1.6 or Band C ended on 14 June 2023. The 2021 edition came into force on 15 June 2022; a 2026 edition exists at https://assets.publishing.service.gov.uk/media/69c122a6cfa346b9d4704a55/ADL1_2026.pdf.
- 9costsupplier figureHörmann UK.RN-YT4PGVA price, true at 2026-09. Hörmann UK's campaign page for its RenoMatic insulated 42 mm sectional garage door. It gives a from-price of £1,847 with the ProMatic operator, stated as a recommended retail price excluding VAT and fitting, for listed campaign sizes.
- 10technicalsupplier figureHörmann UK, guidance.RN-YW85GLHörmann UK's sectional door page, giving a whole-door U-value of 1.0 W/m²K for a 5000 × 2125 mm door with its 67 mm thermally broken LPU 67 Thermo sections.
-
Is building regulations approval needed for a garage conversion?, Planning Portal, accessed 30 September 2026. planningportal.co.uk
-
The Building Regulations 2010, regulation 2 (interpretation), legislation.gov.uk, accessed 30 September 2026. legislation.gov.uk
-
The Building Regulations 2010, regulation 3 (meaning of building work), legislation.gov.uk, accessed 30 September 2026. legislation.gov.uk
-
The Building Regulations 2010, regulation 23 (renovation or replacement of thermal elements), legislation.gov.uk, accessed 30 September 2026. legislation.gov.uk
-
Kingspan TP10 Roof Insulation Board - 2400 x 1200 x 100mm, Wickes, accessed 30 September 2026. Priced at 2026-09 and left there. wickes.co.uk
-
Kingspan TP10 Roof Insulation Board - 2400 x 1200 x 25mm, Wickes, accessed 1 October 2026. Priced at 2026-09, so no calibration is needed. wickes.co.uk
-
Spray foam insulation and mortgages, House of Commons Library, accessed 30 September 2026. commonslibrary.parliament.uk
-
Approved Document L, Conservation of fuel and power, Volume 1: Dwellings, 2021 edition incorporating 2023 amendments, Ministry of Housing, Communities and Local Government, accessed 14 September 2026. assets.publishing.service.gov.uk
-
Garage door offering at a campaign price, Hörmann UK, accessed 1 October 2026. Priced at 2026-09 and left there. hormann.co.uk
-
Sectional Garage Doors, Hörmann UK, accessed 30 September 2026. hormann.co.uk