A toilet that keeps running wastes a surprising amount of water: the Consumer Council for Water says a leaking toilet can waste up to 400 litres a day.1 A cistern that leaks constantly into the pan typically wastes 200–400 litres a day and could add around £300 a year to a metered water bill.2 The good news is that most running or leaking toilet problems are caused by a handful of cheap, easy-to-replace internal components, and almost all of them are DIY-fixable without specialist skills or tools.
This guide covers diagnosis, fixes, and when the job is beyond a simple repair.
Diagnosing the Problem
Before touching anything, identify what you’re dealing with:
Test 1: Is water trickling into the bowl? Put a few drops of food colouring in the cistern and don’t flush. After 15 minutes, check the bowl. If colour appears, water is passing through the flush valve, usually because of a worn flap or seal (also called a flapper or siphon diaphragm). On a cistern with an internal overflow, first check that the water level is below the top of the overflow tube: if water is spilling into it, the fill valve is at fault instead.
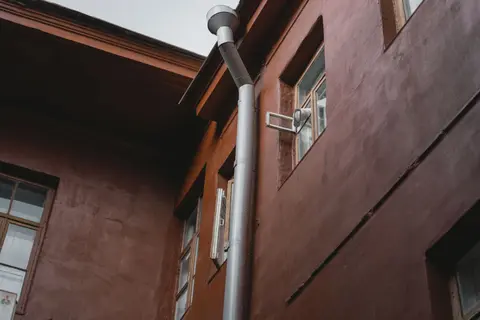
Test 2: Is the overflow dripping outside? If water is dripping from the overflow pipe (on older cisterns, a plastic pipe exiting through the outside wall, often above or near a window), the cistern is overfilling. This means the fill valve (ball valve or float valve) is not shutting off at the correct level. Every WC cistern must have a warning pipe or an equally effective device; on many modern cisterns that is an internal overflow into the pan, so overfilling shows as a trickle into the bowl instead.3
Test 3: Is water leaking at the base of the toilet? Water pooling on the floor around the pan, especially after flushing, suggests a failed pan-to-soil pipe seal, a cracked pan base, or (on close-coupled toilets) a failed cistern-to-pan gasket.
| Symptom | Most Likely Cause | DIY Fix? |
|---|---|---|
| Water trickling into bowl continuously | Worn flap valve / diaphragm | Yes, £2–£15 part |
| Overflow pipe dripping outside | Fill valve / float valve faulty | Yes, £10–£30 part |
| Cistern not filling after flush | Fill valve inlet blocked | Yes, clean or replace |
| Leak at base of toilet | Pan seal / wax ring | Yes, but more involved |
| Cracks in cistern or pan | Damaged ceramic | Replace unit |
| Leak from cistern bolts | Rubber washer failed | Yes, £2–£5 part |
Fix 1: Replacing a Flap Valve (Flapper)
The flap valve (or diaphragm siphon washer on older siphon-type cisterns) sits at the bottom of the cistern and seals the flush outlet. Over time, rubber perishes, warps, or accumulates limescale deposits, preventing a watertight seal. A siphon diaphragm washer costs about £2 from a merchant.4 A replacement seal for a common push-button flush valve costs about £3.5
What you’ll need:
- Replacement flap, seal or diaphragm washer (match your cistern brand or buy a universal fit, typically £2–£15)
- Adjustable spanner or pliers
- Old towels and a small bucket
Steps:
- Turn off the isolator valve on the supply pipe under the toilet (turn slot to horizontal with a flathead screwdriver). If there’s no isolator valve, turn off the water at the stop tap. Water regulations require a servicing valve on the inlet pipe to every WC cistern, so most toilets have one.3
- Flush to empty the cistern.
- Remove the cistern lid.
- Siphon cistern (older style, with a large plastic siphon unit): lift the float arm to one side, unscrew the large nut underneath the cistern holding the siphon in place, and lift the whole siphon assembly out. The diaphragm washer is a flat circular disc inside, swap it for a new one.
- Modern bottom-inlet/side-inlet cistern with flapper: unhook the flapper from the flush valve seat (usually two side clips), detach the chain, and pull it off. Clip the new flapper on and reattach the chain with 1–2 cm of slack.
- Turn water back on, allow to fill, and flush to test.
Fix 2: Adjusting or Replacing the Fill Valve
The fill valve refills the cistern after flushing and shuts off when the water reaches the correct level. There are two types:
Ball valve (float on horizontal arm): older type. If water is running over the overflow, try bending the float arm slightly downward so it shuts off at a lower level. If the float itself has cracked and is waterlogged, replace it (£3–£8 for a new plastic float). If the valve seat is worn, replace the whole valve.
Modern fill valve (adjustable float on vertical shaft): the float position is adjusted by turning a clip or twisting the float up/down on the shaft. On many models, turning clockwise raises the fill level; check the maker’s instructions. The fill level is usually marked inside the cistern; if there is no mark, set it comfortably below the top of the overflow, commonly about 25 mm below.
To replace a fill valve:
- Isolate and drain the cistern.
- Disconnect the supply pipe from under the cistern (have a towel ready, some water will escape).
- Unscrew the locking nut underneath the cistern that holds the valve body in place.
- Lift out the old valve.
- Fit the new valve, making sure the supplied rubber washer seats properly.
- Reconnect the supply pipe, open the water, and adjust the float to set the correct fill height.
A fill valve costs about £10–£30 from a plumber’s merchant or DIY superstore. A basic bottom-entry fill valve costs about £12.6
Fix 3: Cistern-to-Pan Gasket (Close-Coupled Toilets)
On close-coupled toilets, the cistern bolts directly to the pan. A rubber gasket seals the connection. When this fails, water leaks between the cistern and pan, which can look like a pan base leak. To fix:
- Isolate and drain the cistern.
- Disconnect the supply pipe.
- Unscrew the two wing nuts underneath the pan that secure the cistern.
- Lift the cistern away (usually heavy, two-person job).
- Remove the old rubber donut gasket from the flush outlet.
- Fit a new gasket (£2–£12), reseat the cistern, and reassemble.
A plain 1½-inch close-coupling doughnut washer costs about £2 from a merchant.7
Fix 4: Pan-to-Soil Pipe Seal
Leaking at the toilet base after flushing usually means the flexible rubber pan connector or the wax ring sealing the pan to the soil pipe has failed. Replacement involves disconnecting the toilet, which means removing it from its floor fixings. It’s a feasible DIY job but messy:
- Isolate the water, disconnect the cistern, and flush.
- Unscrew floor fixing bolts.
- Rock the toilet gently to break the old seal; lift away (wear gloves).
- Scrape the old seal from the soil pipe spigot.
- Fit a new flexible pan connector or wax ring.
- Reposition the toilet, press firmly to seat, and refix.
If the soil pipe is cast iron, cracked, or the floor screed is damaged beneath the toilet, call a plumber, you’re now dealing with a drainage issue.
Limescale and Blocked Inlets
In hard water areas (much of southern and eastern England), limescale builds up inside fill valves and siphon jets. Before replacing a fill valve that’s running slowly or not shutting off properly, remove the valve head and check for grit or limescale on the rubber seal. Soaking in white vinegar for 30 minutes often clears the build-up.
When to Call a Plumber
Call a qualified plumber (ideally WaterSafe approved) if:
- The toilet pan or cistern is cracked
- There is waste water visible on the floor after flushing that you cannot trace to the pan seal
- You have no isolator valve and the property stop tap doesn’t work
- The toilet is part of a wider bathroom refurbishment
- You’re uncomfortable working with water fittings under mains pressure
WaterSafe is the water industry’s register of approved plumbers, so it is a good place to find one; Gas Safe registration covers gas work, not toilets.8
A plumber’s call-out in 2026 typically costs £80–£150 for the first hour, with flap valve or fill valve replacement adding little extra time. For a running toilet that’s wasted £200 in water bills, that remains good value.
Cost Summary
| Repair | DIY (parts only) | Plumber (parts + labour) |
|---|---|---|
| Flap valve replacement | £2–£15 | £80–£150 |
| Fill valve replacement | £10–£30 | £100–£180 |
| Cistern-to-pan gasket | £2–£12 | £100–£160 |
| Pan connector / wax ring | £8–£25 | £120–£250 |
| Full WC unit replacement | £80–£350 | £350–£800 |
References (8)
Figures in this note were checked against the sources below on 30 September 2026. Superscript numbers in the text point to them. Every source the site cites, by topic.
- 1technicalfairConsumer Council for Water (CCW), guidance.RN-WQX5Y4The statutory water consumer body's page on household water use: about 139 litres per person per day, with typical volumes for showers, toilets and appliances.
- 2technicalfairWaterSafe, guidance.RN-X0ZE7XA WaterSafe article by Thames Water's water efficiency project manager says a toilet constantly leaking from the cistern into the pan wastes around 200 to 400 litres a day and could add around £300 a year to the water bill. WaterSafe is the water industry's national register of approved plumbers; not yet on the allowlist.
- 3technicalvery strongThe National Archives, guidance.RN-MY6E6ESchedule 2 to the Water Supply (Water Fittings) Regulations 1999, which applies in England and Wales. It caps WC flush volumes and requires backflow prevention on every water system.
- 4costsupplier figureToolstation.RN-SNOHUTA price, true at 2026-09. Merchant product page for a standard 127 mm siphon diaphragm washer, the part that fails in older siphon cisterns, priced at £1.89 including VAT. Supply-only merchant price, tier 5 by the price rule.
- 5costsupplier figureToolstation.RN-R7VUVHA price, true at 2026-09. Merchant product page for the replacement seal of a common Fluidmaster dual-flush push-button flush valve, priced at £3.15 including VAT. Supply-only merchant price, tier 5 by the price rule.
- 6costsupplier figureToolstation.RN-MYYJEWA price, true at 2026-09. Merchant product page for a basic bottom-entry WC fill valve with a brass shank, priced at £11.95 including VAT, which sets the low end of the note's £10–£30 range. Supply-only merchant price, tier 5.
- 7costsupplier figureToolstation.RN-UWFWVVA price, true at 2026-09. Merchant product page for a 1-1/2 inch close-coupling doughnut washer, the cistern-to-pan seal on close-coupled toilets, priced at £2.19 including VAT. Supply-only merchant price, tier 5.
- 8technicalfairWaterSafe, guidance.RN-0AV3J0WaterSafe's own About page describes the register as a free search facility funded by the water industry to help customers find competent, qualified plumbers approved under the water fittings rules. Not yet on the allowlist; tier 4 as an industry-funded consumer service.
-
How much water do you use?, Consumer Council for Water, accessed 30 September 2026. ccw.org.uk
-
Why Should We Care About Leaking Toilets?, WaterSafe, accessed 30 September 2026. watersafe.org.uk
-
The Water Supply (Water Fittings) Regulations 1999, Schedule 2: Requirements for water fittings, legislation.gov.uk, accessed 30 September 2026. legislation.gov.uk
-
Syphon Diaphragm Washer 127mm (5”), Toolstation, accessed 30 September 2026. Priced at 2026-09 and left there. toolstation.com
-
Fluidmaster Dual Flush Push Button Valve Replacement Seal, Toolstation, accessed 30 September 2026. Priced at 2026-09 and left there. toolstation.com
-
Viva Skylo Bottom Entry Fill Valve Brass Shank, Toolstation, accessed 30 September 2026. Priced at 2026-09 and left there. toolstation.com
-
Close Coupling Doughnut Washer 1-1/2”, Toolstation, accessed 30 September 2026. Priced at 2026-09 and left there. toolstation.com
-
About WaterSafe Register, WaterSafe, accessed 30 September 2026. watersafe.org.uk